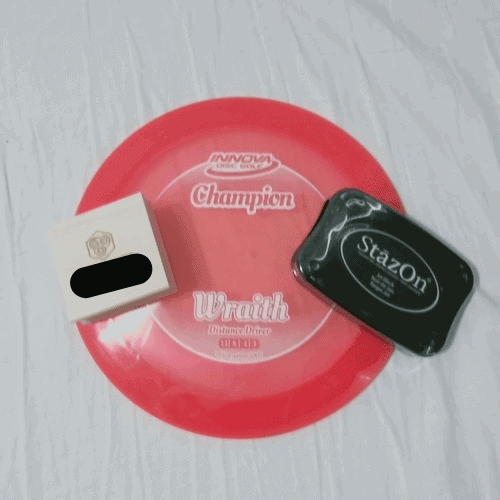
Have you ever found a lost disc with a custom stamp and wondered how they created it? I’ve designed unique stamps for myself and a few friends over the years, so I wanted to share my process and experiences making custom disc golf stamps!
The best part about creating your own stamp is that it makes the disc feel unique and special. I’ve found that people are much more likely to return lost discs with special stamps because it feels
like it belongs to someone who really cares.
There are plenty of ways to design and order custom stamps, but here are the steps that I follow and the websites that I order from!

Steps to Create a Custom Disc Golf Stamp
1. Design Your Custom Stamp
The best part about a custom stamp is that you get to decide what’s important to include! You decide on the design, color, layout, and size of the stamp, so spend a good amount of time figuring out exactly what you want.
There are a few ways to get a custom logo design for your stamp.
Use a tool like Canva or Photoshop
If you like creating your own designs there are a bunch of free tools online that are perfect for this. My favorite tool to use is Canva as it’s free and offers a good variety of templates and logos that you can build off of.
Ask a friend or find free designs online
Find a friend who has a good eye for design and see if they’re up for throwing together a couple of logos that would work as a stamp. If you’re unsure of what style stamp you want, searching around on Google is a great way to get inspiration and find other free styles online.
Commission a design on Fiver
Fiver is a great resource if you want a design that’s quick, easy, and more professional looking. Explore the portfolios of different artists on the site until you find the perfect style for disc golf.
2. Choose The Stamp Size
The size of the stamp is important and depends on what your final design will be. If you want a stamp with a lot of text then it’s important to leave enough space so that it’s clean-looking and legible.
I recommend choosing a stamp that’s at a minimum of 1.5 x 1.5 inches.
The stamp size that I prefer is 2 x 2 inches since it has enough space to not look cramped and fits nicely on the bottom of the disc.
Any stamp that’s over 2.5 x 2.5 inches could be alright, although it will be hard to stamp on the bottom without it covering the middle section of your disc.
3. Upload Your Design
Many online stores make custom stamps with a design or logo that’s uploaded. I’ve always ordered from rubberstamps.net and have had a great experience with them each time.
After choosing the stamp size, upload the custom design and preview how it will look on the stamp. Now’s the time to ensure it fits and looks exactly how you’ll want it to look on the disc.
If something’s not right, make whatever adjustments you need to the design and then upload the new one.
4. Order Custom Stamp & Ink
After selecting your design the only step left is to proceed to the checkout and finish placing the order. The next item that you’ll need is an ink pad that is larger than your stamp and some liquid stamp cleaner.
It’s important to get an ink pad that fits your stamp and will actually stay on the plastic material of your discs. My favorite is the StazOn Jet Black Inkpad since it’s the longest-lasting ink when put on the plastic material of discs.
- Measures 3.8 x 2.6 inches
- Ink easily adheres to plastic surfaces
- 2 minute drying time
Tips For Making A Custom Stamp
1. Match the Stamp Shape to Your Design
There are many shapes for custom stamps although the most common one is circular. To get the best results choose the shape that fits your design, either square or circular.
2. Use Large Text
A lot of custom stamps include a name or phone number so it’s important to make sure the font size in your design is large. Even if it looks clear on the image, there’s a chance it can become smudged and unreadable once you use the stamp.
Find a font that is clear and adjust the size, letter-spacing, and font-weight until your text is large and readable.
3. Find a Large Stamp Size
As mentioned above, I wouldn’t get a stamp that’s any smaller than 1.5 x 1.5 inches because there are a lot of issues that can happen when you go too small. Another thing to consider is bumping up the size to either 2 inches or 2.5 inches if your design includes an image or logo with text as well.
How Do You Remove Stamps From Disc Golf?
The best way to remove a stamp from your disc is by using 100% Acetone combined with cotton swabs. Put a small amount of the liquid onto the cotton ball and then rub it consistently across the stamp.
After a few seconds, you’ll notice the ink will immediately begin coming off of the disc. Continue rubbing the Acetone onto the stamp for 20-30 seconds until the disc is clear and the entire stamp has been removed.


